DIY phone stand. How to make a phone stand? Convenient gadget made from scrap materials DIY car phone stand
Nowadays it is difficult to find a person without mobile phone, which has become an integral part of our modern life. And every phone requires regular charging from the network. When all family members are charging their mobile phones and gadgets, it seems that the room is entangled with numerous wires, which often get tangled and get in the way. Savvy craftsmen came up with a phone charging holder especially for such cases and shared with the world how they made it themselves!
This case will fit both a smartphone and a wire, and it’s also bright. appearance it looks much nicer, more aesthetically pleasing and more modern than just a phone lying on the floor. A holder for charging a phone is made from a bottle of Johnson`s cosmetics, covered with a colorful paper napkin using the decoupage technique.

How to make a phone charging holder with your own hands?
Everything is very simple. Find a plastic container of suitable size. Johnson`s products fit perfectly into the holder due to their elongated oval shape. We outline the outlines of the future cover with a pen and cut out the blank with sharp scissors or a knife.


A trimmed bottle will be easier to wash and remove cosmetic residues. Make sure the inside surface is not greasy. In the protruding part of the holder, cut a hole suitable for the plug of your charger. Then carefully sand the entire surface of the bottle and edges with sandpaper.

You can decorate the holder with anything, not just decoupage napkins. You can try painting it with acrylic paints, wrapping it with threads, gluing ribbons and beads, pebbles, twigs and shells - let your imagination run wild! If you decide to follow this example, then prepare a bright paper napkin, decoupage glue and a sponge (brush).

Carefully cover the bottle with a napkin, also covering the outer part with glue (or varnish).


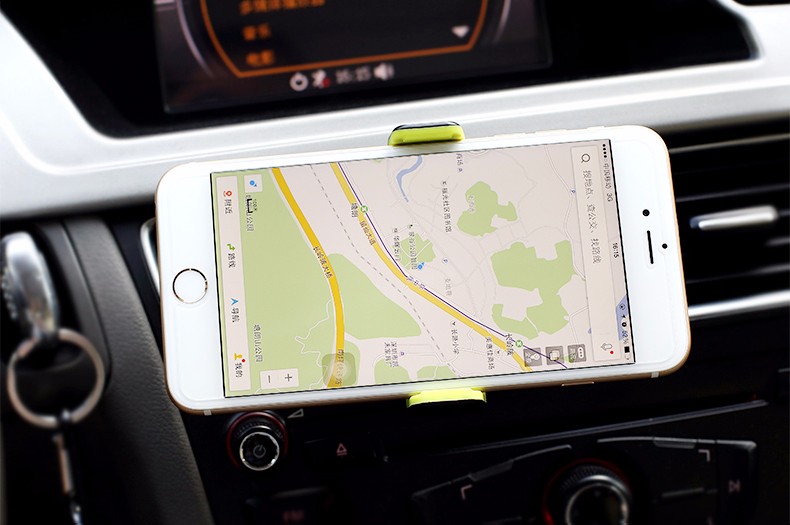
A modern person never parts with a smartphone anywhere, even in a car, when all attention should be focused on the road. To increase the safety of each of us and improve comfort, devices such as car holders were invented.
They perform several functions at once: they provide reliable fastening of the smartphone in a certain place so that it does not slip on different surfaces in the car and is not lost in the back seat; they make controlling the car and the smartphone much easier and more convenient, especially if you use Hands Free. And if you want to use your smartphone as a navigator, then you simply cannot do without such a holder. If you are starting to think about purchasing a much-needed gadget, then before the purchase itself it would be good to clearly understand what the most convenient holder should be for you.There are smartphone holders designed for a specific model. They are usually equipped with a charger and several more special functions, which simplifies the use of the gadget while driving. But such devices are also more expensive than universal ones. Purchasing them is justified only if you are not going to change smartphones often, but stay with the chosen model for at least a couple of years.
That is why, in most cases, it will be more practical to buy a universal holder, which can then be converted in a matter of seconds to use a completely different gadget. The phone can be attached to them in different ways:
- using magnets, but this is not the most The best way fastening, since a smartphone can fall every now and then, although this method of fastening a smartphone is now the most popular;
- using a cone clamp. Such devices are more reliable, but you will need to immediately check how easy it is to get the phone;
- using polyurethane legs that expand to suit the specific size of the smartphone. Such holders still have the same problem: sometimes the phone is fixed in them so tightly that it cannot be easily taken out.
The holders differ not only in the way the smartphone is attached to them, but also in the way they are attached to the car panel. This is their main difference and the selection criterion for most motorists.
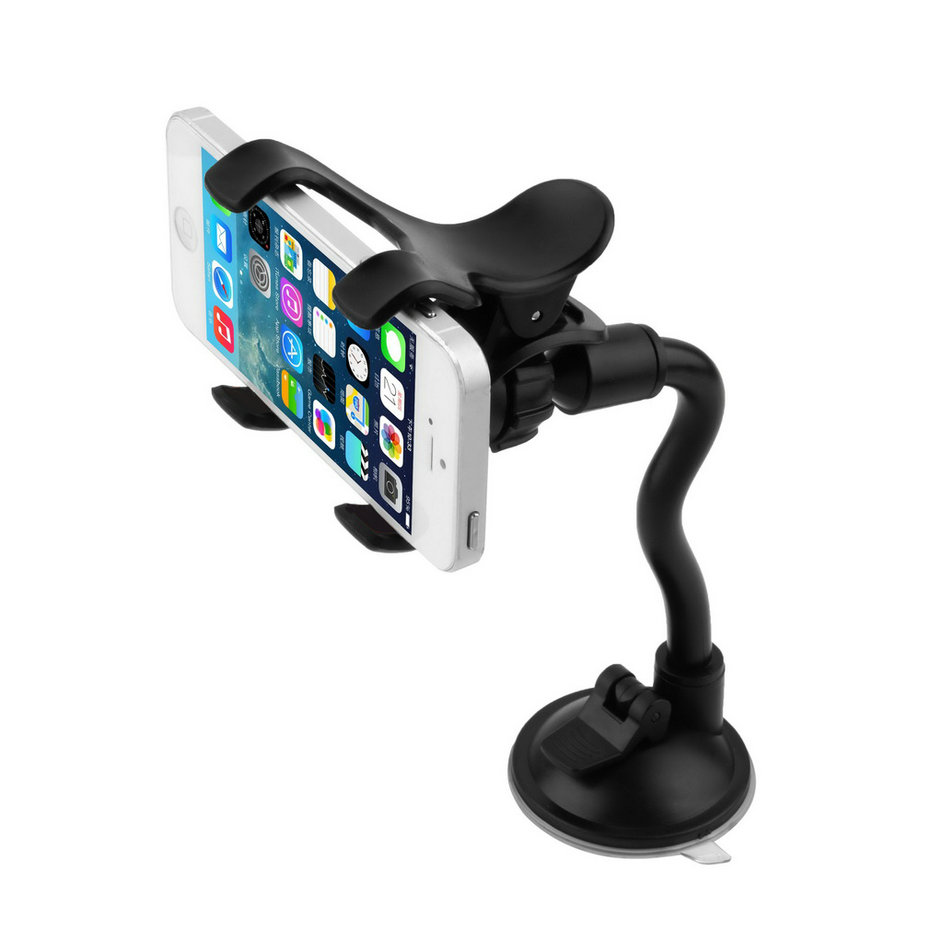
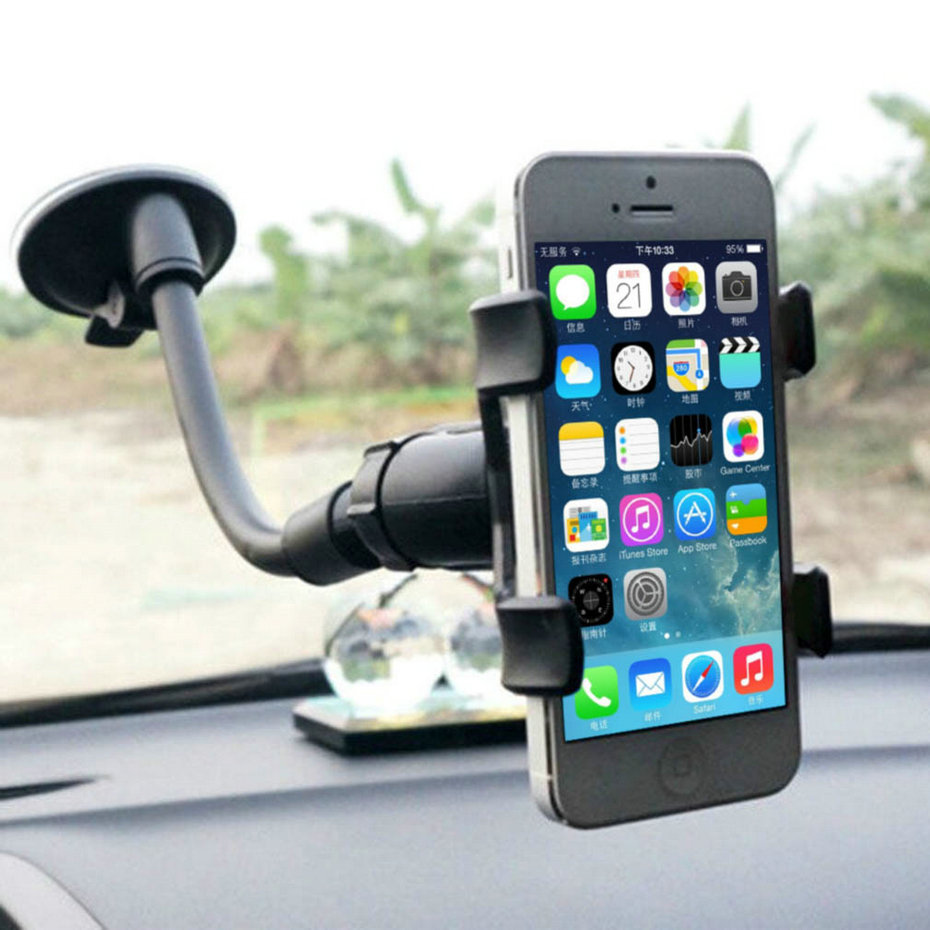
Suction cup holders are one of the most popular: they are easy to install and do not require damage to parts of the car interior. Most often they are attached to the windshield, but for this the surface must be perfectly smooth, clean and even, so if the glass has a significant slope, you may have to attach the holder to its upper part, which is inconvenient. The disadvantages of such fastening also include the fact that over time the holder begins to peel off and disappear, and if the suction cup is made of rough rubber, then at low temperatures it loses its elasticity and. Naturally, it falls off.
Adhesive-based holders can be attached to any surface, but after dismantling, a noticeable mark may remain. In addition, a smartphone that is too heavy may break the mount after a while. But for not very large compact gadgets, this is a good option.
The holder with fastening will definitely never fall off, but they are most often attached to ventilation deflectors. Here there are obvious disadvantages: possible noise when driving on uneven roads, broken deflector shutters, closed air nozzle, etc. Compared to all other fastenings, this is the least convenient and practical. It would be better if such a holder would be attached to a mirror, but there are very few such models.
An alternative to all holders is an anti-slip mat. It does not provide the same convenience of using a smartphone as a holder, but it can be easily removed and replaced.
1. Suction cup holder.
Holds your phone on the front panel or windshield.

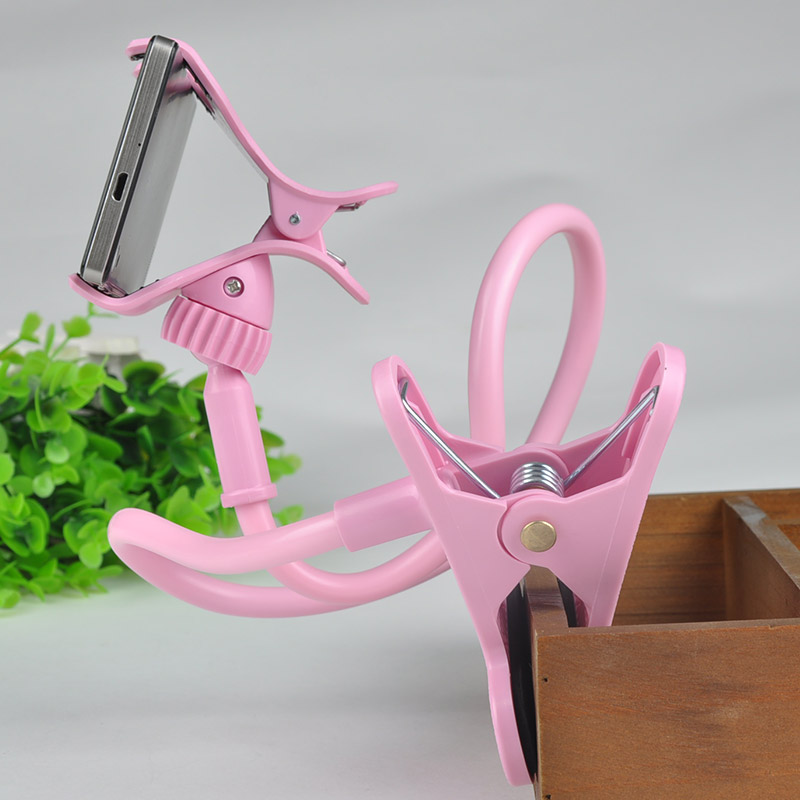
2. Universal clip with flexible cord.
Allows you to rotate the gadget 360 degrees.


3. Mount on the steering wheel.


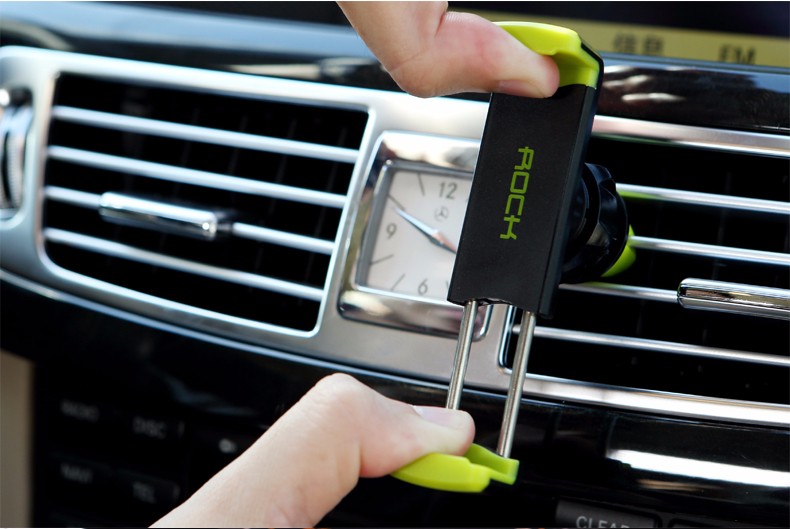
4. Width-adjustable bracket.
Installed on the fan grille.


5. Magnetic ball holder.


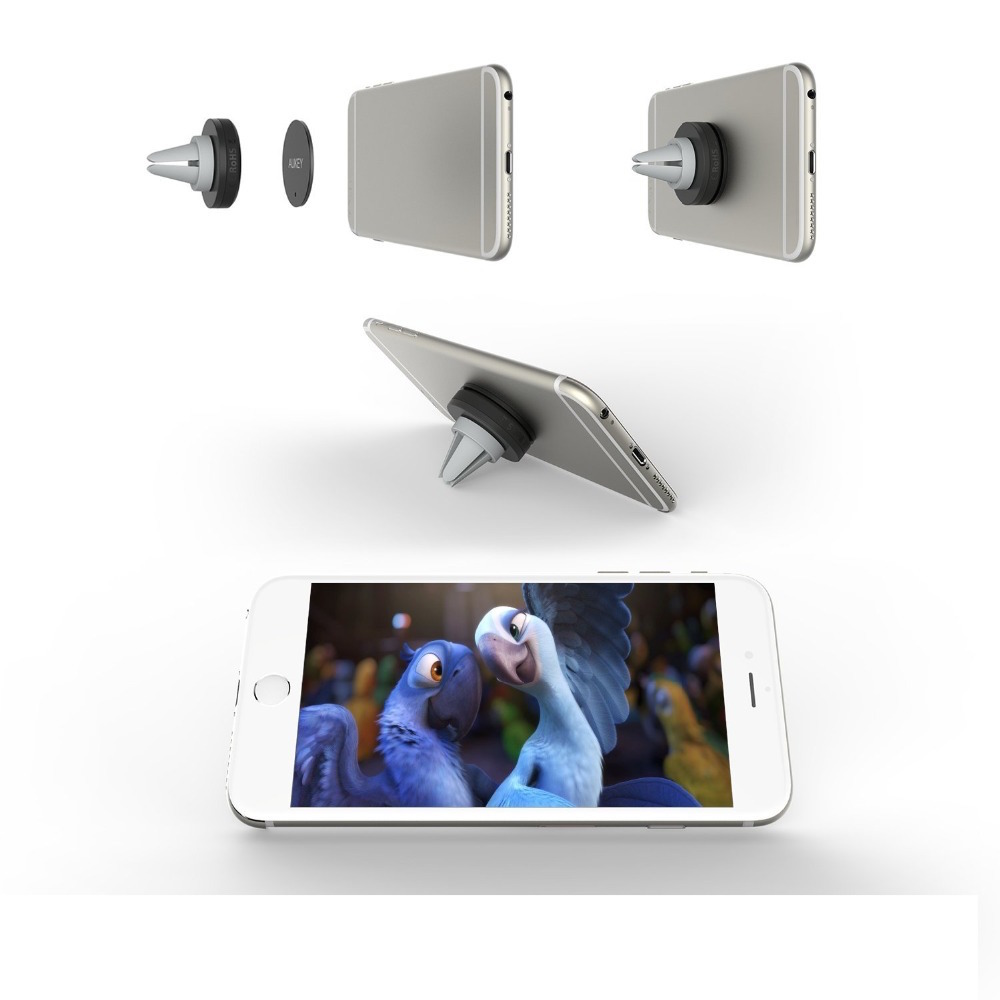
6. Universal magnetic holder.

7. Mobile phone panel with USB cable.
Flexible panel with anti-slip coating for a wide range of surfaces.
A big and warm hello to everyone! I haven’t written in the “DIY” section for a long time. Regular readers have probably forgotten that such a thing exists. But oh well, today I will improve. And I will share with you very cool ideas on how to make a phone stand with your own hands.
Lately I read a lot, study information, watch videos. But holding the phone in your hands is not very convenient. And it happens that, for example, I’m preparing food, cutting food, and I have to prop up my phone with whatever comes to hand. And suddenly the idea came to me, why not buy a stand at the store that will make my life much easier. Having scoured the Internet, finding the answer to the question of what it costs and what it costs, I came across a photograph that showed that very thing, but made in seconds and with my own hands. Then the idea sparked in my head to put together several inspiring ideas. And in the end I was born, I hope interesting post. So, let's begin!

I suggest starting with the very best option for a paper phone stand. You can build it at any time and anywhere, the main thing is to have a sheet of paper approximately A4 size on hand. It seems to me that students and schoolchildren will like this idea. The main principle here is to take a sheet of paper, preferably thick, and fold it lengthwise to make at least 3 layers, but of course everything depends on the width. Then you need to fold the paper again, making folds across so that 3 wide edges of the same width and one small one are formed. Look at the photo, it clearly shows what the end result should be. The last step is to make two small folds.

I can’t even imagine who could have such a rarity as a box of tape cassettes for a tape recorder. But it turns out that such an object, seemingly completely useless, can be used. In a couple of seconds, by turning it over in a certain way (see photo), you will get a very cool stand for your smartphone. Moreover, if you paint it with paint from a bottle, then few will guess what it is made of.

If you have several DIY kits lying around at home, then it is quite possible to build a structure to hold your phone in a horizontal position. And this is done in a matter of minutes. And it’s also easy to disassemble it, putting it back in place.

A plastic card as a phone stand? The idea is bold, but quite realistic. All you need is a couple of cards and some strong scissors. Trim the parts as shown in the photo and enjoy watching the video, taking photos and reading e-books.

The next way to make your life easier is to stock up on six pencils and four erasers. Basically, you need to make a three-dimensional figure, as shown in the picture. Start with a simple triangle, then add one edge at a time, securing it all with rubber bands. Get an original delivery for the phone.

Having a couple of wooden pieces in the house, it is possible to make an interesting and original, and most importantly durable device for smartphones. You can glue the parts with hot or universal polymer glue. And indeed, this design will serve you for a very long time.


Here are some more lifehacks for your phone to keep it running while charging. Such devices are needed mainly when there is simply nowhere to put the gadget unless there is a table or cabinet nearby. Such holders are made from a plastic bottle, as in the first case, or from thick cardboard, as in the second.

I've seen so many ideas with toilet paper rolls, but this one! You will need the sleeve itself and 4 paper buttons (to be honest, I don’t know what they are called correctly). Attach them as legs, cut a hole at the top to size so that you can put your phone through it, and enjoy the result. It is better, of course, to decorate such a stand with something or simply paint it. 
As you already understand, making a phone stand out of paper is the easiest option. So, you will need a piece of very thick cardboard. If there is none, then make it from several layers, gluing them to each other. Cut holes in the part as shown in the picture. Moreover, such a holder is suitable not only for smartphones, but also for tablets.

Well, the very last way I suggested to make a phone stand with your own hands is to use a stationery clip. I’m sure everyone will have it, and if not, then it’s not very expensive in stores. Take a couple of these devices and bend one round part of the paper clip inward. It will serve as a barrier for the phone to prevent it from rolling off. Place one binder inside another. Place the smartphone so that it rests on one ear, and the second one is bent towards the screen. Here's a simple holder for you!
That's all for today, I hope you liked the ideas and were inspired to make one of the presented gizmos! See you again!
The use of modern technical innovations requires us to change some details in everyday life. For example, using a smartphone in a car will be much more convenient if you attach the device in close proximity to you on a special holder. This way, you can not only easily answer the call, but also benefit from navigation programs or other similar applications. In this article we will look at the most common fastenings for cell phone, which allow you to conveniently fix it in the car.
Some phone holders have a suction cup, which significantly expands the possibilities of installing such a stand, including on uneven surfaces. Over time, the suction cups lose a little stickiness and do not stick well, but this can always be corrected by rinsing them in warm water (the liquid will wash away all dirt and accumulated fats). This type of cell phone holder is well designed, and all buttons or ports of most gadget models will be fully accessible without being covered by elements of the device. In addition, various mount options allow you to mount your phone on the windshield or even on the dashboard, but any other convenient place in the car will be inaccessible. 
The advantages of using this particular option include ease of installation and the absence of the need to make any changes to interior elements, while the main disadvantage of this type of phone mount is sensitivity to the peculiarities of placement. For example, if the car window is located at a strong slope, then it will be possible to attach the suction cup only in its upper part. The too long bracket is also inconvenient to use, since it swings the smartphone violently when the car is moving.
Important!When choosing a suction cup holder, pay attention to the thickness of the rubber from which it is made. In the cold season, material that is too thick will quickly lose its elasticity, and the holder will simply fall off the glass.
Clip for attaching a phone with a flexible cord
This option for placing your phone in your car will cause you a lot more problems than benefits. Despite the fact that it allows you to fix the phone almost anywhere in the vehicle without the need for glue or suction cups, such holders will create quite a lot of noise when driving, blocking the air flow coming from the deflector. Considering that the clothespin is most often attached to the heater grille, which has many thin jumpers-blinds, it is better for you not to drive over holes and potholes, as strong shaking can cause the fastener to break.
 Among the advantages of using the clip is the ability to rotate the phone 360 degrees (made possible thanks to the presence of a flexible cord), but this does not make it unique. Therefore, mounting the phone on a deflector or in any other place using this method is not the best option for solving the problem of placing a smartphone in the car.
Phone holder for steering wheel
A phone mount on the steering wheel of a vehicle is enough simple design, in which the platform for the gadget consists of two black plastic plates that fit into each other. They have a spring inside that allows you to use the holder for phones of very different widths, holding them from below and from above using silicone rollers.
You won’t have to spend a long time figuring out how to install such a phone holder in your car. Mounting on the steering wheel is done using a silicone loop, at the end of which there is a plastic pedal. By pressing it, you can remove the holder from the steering wheel.
 Among the disadvantages of this type of fastener, it is worth highlighting the limited visibility of devices on dashboard(in particular, the speedometer indicators are poorly visible, which can easily lead to a fine for speeding), the appearance of a feeling of motion sickness at the initial stages of using the device, which occurs due to the rotation of the phone along with the steering wheel of the vehicle. In addition, if the power cord is connected to the phone, the cord often wraps around the steering wheel when turning. True, this does not always happen.
Bracket that is adjustable
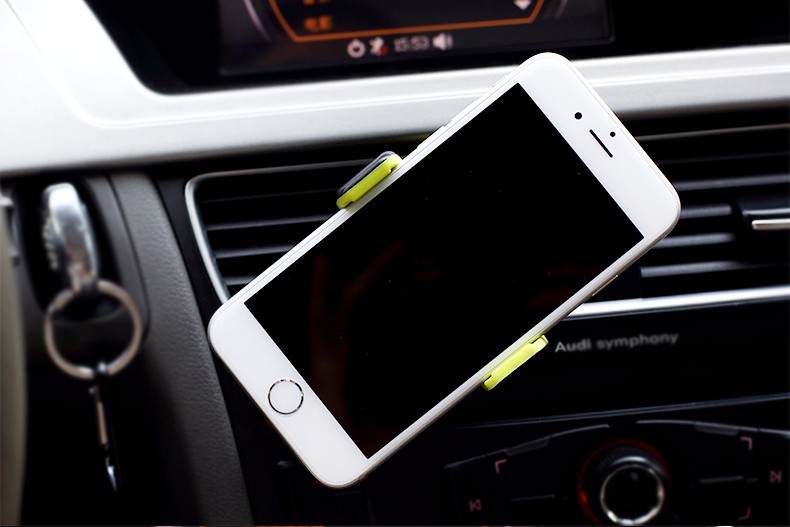
Another option for devices for holding the phone when moving around vehicle. The adjustable bracket is mounted on the ventilation grill and is suitable for smartphones with different body widths. The gadget is inserted between two limiters, one of which extends down, thereby providing the space the phone needs. The advantages of using this type of mount include the compactness of the mount itself and the ease of installing the phone, and among the disadvantages, there are all the same disadvantages as in the case of using a clip: noise, knocking and the possibility of breaking the place where the holder is installed.

There are so many phone holders for cars that you can’t immediately choose which one is best. Some of them are similar to each other, and some are radically different from their own kind. TO last option It is worth taking a magnetic ball made of steel and coated with a layer of machined aluminum. 3M® VHB™ bonding material is applied to the bottom of the ball base, which can provide a secure attachment to the surface of the dashboard. The bonding layer is absolutely harmless to the place where the holder is attached, so it can be removed without any problems.
 The second element that is included in the design of this mount is a magnetic washer that remains on the ball base and holds the device using magnetic attraction. Thanks to it, it is possible to change the angle of inclination of the mount.
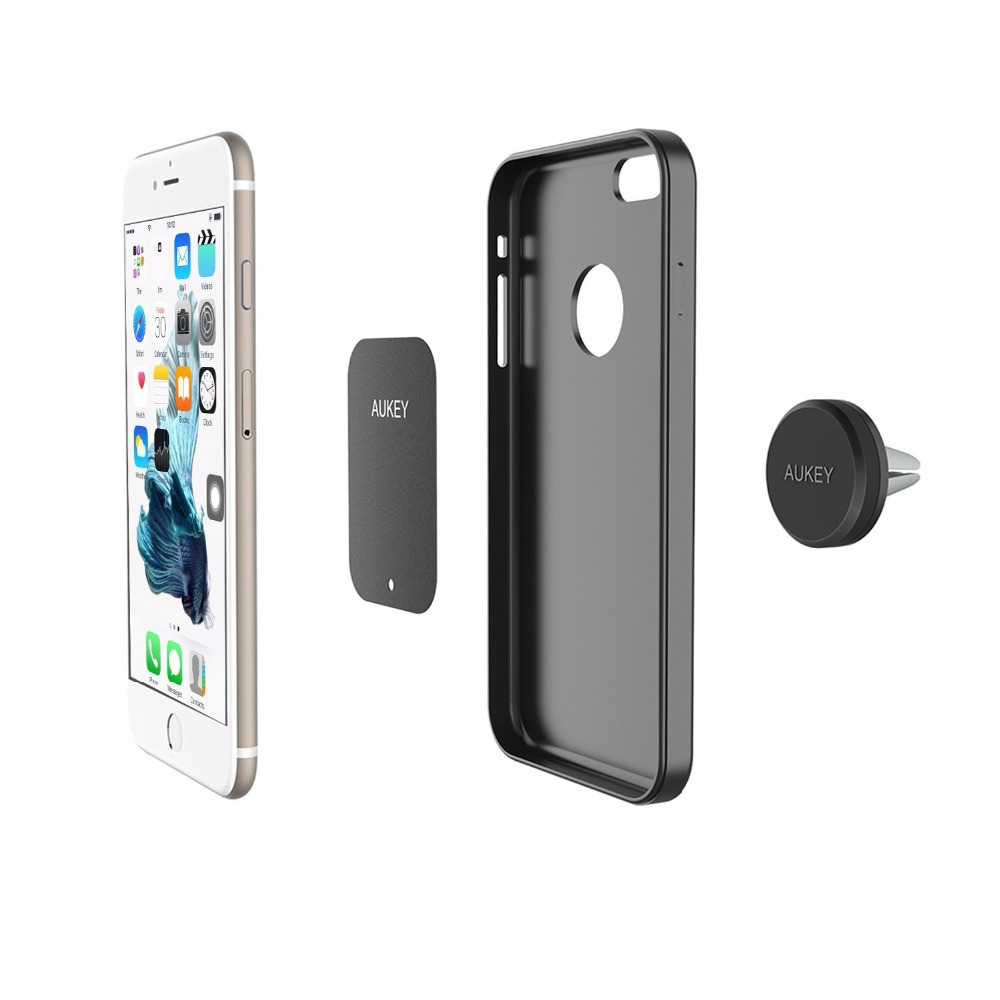
The third component is a metal plate that is glued to the phone using 3M® VHB™. It is she who is attracted to the magnetic ball and securely fixes the gadget in one position. The silicon core guarantees smooth gliding and a strong grip, thanks to which you can easily move your phone from vertical to horizontal position, while changing the angle of inclination.
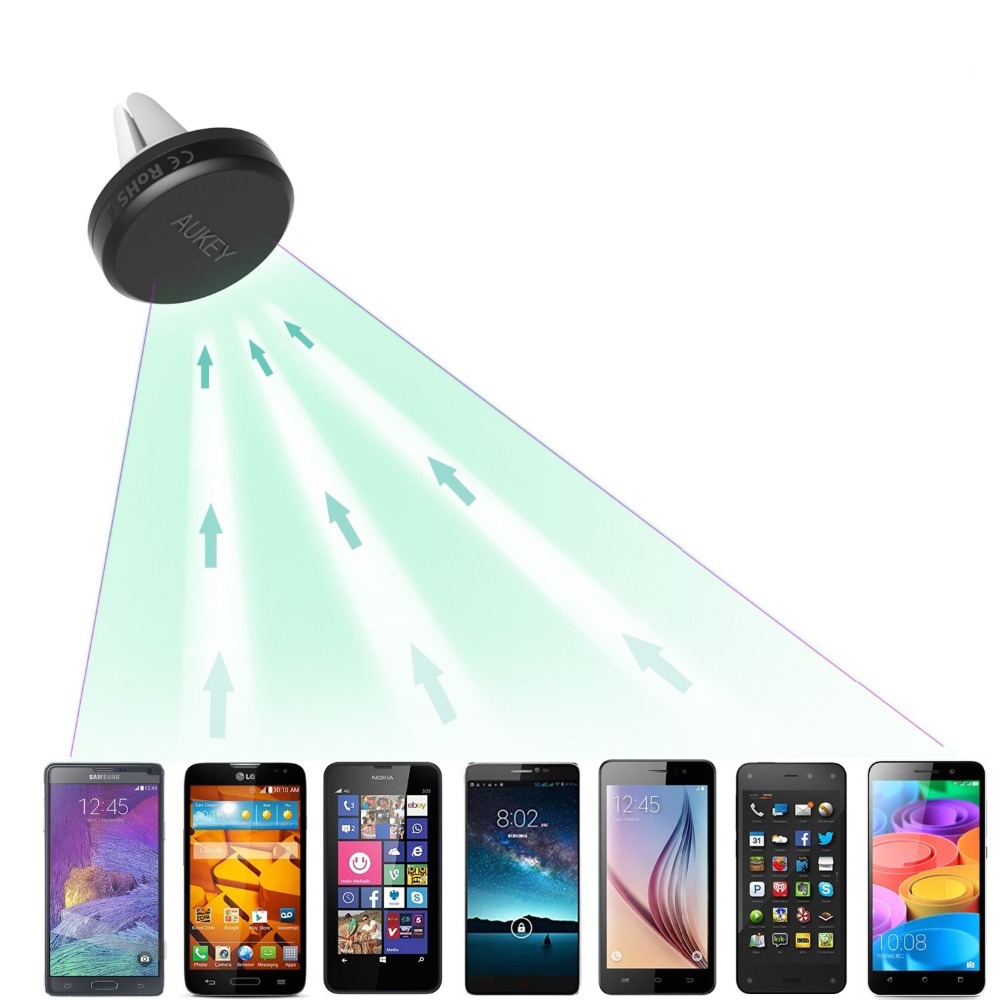
If you don’t know how to attach a phone holder to a dashboard, or all the previously purchased devices did not meet your requirements, we recommend that you turn your attention to a completely new development in the field of such inventions. It is based on the capabilities of a powerful neodymium magnet. You need to install a special ring on your phone (tablet) and place it in your car magnetic holder(made of metal). After this, as soon as the smartphone is near the mount, the magnet previously installed on its cover will be attracted to the holder and ensure tight contact with it. The rubber core promotes maximum contact between the two surfaces, guaranteeing comfortable rotation of the device by 360%.
 Most often, this car phone holder is installed on the control panel, and its main advantage is the ease of mounting and further placement of the device. As for the disadvantages, the main one is the inability to move the stand multiple times across the dashboard (the material from which the mount is made is intended for one-time use).
Flexible phone panel
If you know well what a standard smartphone holder is, then when you see a flexible panel (mat), you will immediately understand that it is somewhat different from the usual devices. It does not need to be glued or secured to the instrument panel in any other way, because the material of manufacture (silicone) already allows it to stick to the interior trim. The stand comes with two cables: a base (with a USB connector) and a magnetic cable with micro USB and Lightning connectors.
The phone holders are installed on the mat, and a micro USB or Lightning connector coming from a magnetic cable is inserted into the smartphone itself. After this, you need to install the cable base in place.
 The USB connector connects to charger, after which the mat is ready for use. The base has led indicator, with which you will see the start of charging. The smartphone is placed between the clamps, like on a stand. It is important that all buttons and connectors of the device remain open, and nothing interferes with its full use.
The position of the latches can be easily changed: the smartphone can be installed both horizontally (for example, for navigation) and vertically (for communicating with family and friends). You can also choose the most convenient viewing angle. This holder is a universal device, which means it is suitable for any smartphone, regardless of screen size.
Standard holders for a cell phone in a car do not always justify trust, which is why a more practical option is often universal mounts that can be converted to use another gadget within a few seconds. In this case, the phone is fixed in one of three ways:
Using magnets, which is not the best option for fixing, since the smartphone may periodically fall.
Using a cone clamp (a more reliable fastening option, just check how easy it is to get the phone out).
Using polyurethane legs that can be expanded to suit the size of a particular device. As in the previous option, problems may arise with removing the gadget. Of course, this method of attaching a smartphone is also not without its drawbacks, but at the same time it is a good alternative to non-universal holders.

A car phone mount can have a wide variety of shapes and designs, and often turns out to be a fairly simple device. This includes a mesh pocket in which the phone fits, just like in a regular trouser pocket. Such a device is often used not only to place a smartphone, but also for temporary storage of other small items (cigarettes, keys, etc.). The mesh pocket can be easily mounted on any flat surface by gluing it to it using double-sided tape.

How to secure your phone if there is no holder
If you decide not to buy a special device for fixing your phone in the car, or you still couldn’t figure out how to choose the right holder for your phone in your car, then we suggest you consider some options for fixing your phone using improvised means.
1. We use a rubber band. All that is required of you when using this method is to insert the elastic band between the “ribs” of the interior stove grille so that the phone can be placed in the two loops formed. Of course, part of the screen will be closed, but the smartphone will be securely fastened.
 2. Buy a stationery clip (binder clip). Having bought a regular paper clip, you need to remove the staples from it, bend it and wrap it with thick thread. One part (clothespin) needs to be hooked onto the air duct and secured with an elastic band, and the second will be used as a fastener for the phone. The advantages of this method include the low cost of the product and ease of execution, but the disadvantage is the complexity of subsequent removal of the phone and the possibility of rough impact on the device body, since the thread does not always soften the load. You also won't be able to change the angle of the phone, and any attempts to do so may damage the air duct grille.


3. Use wire for fixation. For those who are ready to sacrifice the integrity of the panel for the sake of a good mount for the phone in the car, there is a method based on creating a wire holder. To do this you will need strong stainless steel wire and a drill. Using the prepared tool, you need to drill holes of a suitable diameter in the dashboard, after which you should bend the wire and insert it into these holes. Now all that remains is to hang the phone or tablet by the case.
Important!This mount is only suitable for tablets in a book case, but in this case the device is not always securely fastened. Moreover, it can easily block access to the radio.
When I travel, I use my smartphone as a navigator. I've had several factory made car phone holders and there was always something that didn't work for me. Over time, they become loose, or installing a phone in them becomes problematic.


Show 5 more images


The last car phone holder I purchased was a sticky silicone mat with slots in which you could mount your smartphone upright on its side. But my friend could not install her smartphone in a leather book case into it; she had to remove the case. I decided to bring to life an old idea. Life hackers must act, let the rest whine!
You will need:
- a piece of wood, approximately 300x100x8 mm (I had a piece of black fiberboard)
- mini loop
- spring
- a few screws, glue
- engraver with attachments or hand router
- mounting platform (I used the notorious silicone mat)
Note: This holder mounts to a rough surface on the dashboard, and if you want to place your phone on the windshield, this is definitely not your option.
I will show you the simplest option for assembling a phone stand in a car. In the end I used sealant after I assembled the holder, but that was because I remembered it too late.
Files
Step 1: Cutting out the parts


From a piece of fiberboard I cut three parts of the following sizes:
- Top cover 150x90x8 mm
- Bottom cover 130x90x8mm
- Roller 9x90x8 mm
The roller needs to be glued to the top cover at a distance of 5 mm from the edge; this indentation will allow you to use the holder with one hand. When the glue has dried, secure the roller with two additional small countersunk screws. This part will protect the top edge of your smartphone.
Step 2: Making the Slots


Using a linear milling compass or a milling bit (or a hand router), make a slot in the bottom cover, slightly wider than the smartphone in the case. The smartphone should not sit tightly in the slot; I will return to this point later. The slot will protect the bottom edge of your smartphone.
If the piece of wood from which you are making your smartphone holder for your car is too thin, you can glue two beads on the bottom cover to create a slot for your smartphone.
Cut a cutout for the spring on the top cover, on the side with the bolster. The cutout should not be blocked by the loop and should be slightly longer than the spring. The picture shows that this cutout turned out very sloppy. My engraver seems to live his own life, moving wherever he pleases.
When you're done with the slot and cutout, sand until you're happy with it and remove any dust.
Step 3: Apply sealant


Place masking tape around the areas where you will apply the sealant. Once you have applied the sealant, wet your finger with soapy water and smooth the surface of the sealant with it. Pay special attention to the edges to ensure there are no loose pieces of caulk sticking out.
When you are finished applying the sealant, carefully remove the tape so that the edges of the sealant are even and leave the parts to dry overnight.
Step 4: Attach metal parts and assemble the structure


Attach the loop very carefully. If it is tilted slightly, the lids will not be parallel to each other when opened. Depending on the material you used for the lids, the hinge and spring can be screwed directly onto the wood. I didn't have the right size screws, so I used bolts and nuts. I made recesses for the nuts so that they hardly stand out above the surface of the covers.
First we fix the mini loop on one of the covers, then we fix the spring on both covers. After this, we attach the loop to the second cover. This makes it much easier to secure the loop correctly.
Step 5: Decorate the holder


I had an unnecessary piece of leather, using percussive letter stamps (by first wetting the leather) I made an inscription. The options to highlight the uniqueness of your holder are truly endless.
My Skoda Yeti has a wonderful flat area on the dashboard. Our holder must be mounted on an almost flat surface. If the surface of your dashboard is not flat, you will have to mount the holder to something else or level the surface somehow. I already mentioned that I had a sticky silicone mat. Using scissors, I cut off all the protrusions that hold the smartphone in a vertical position until I just got a flat silicone mat. You can buy these on eBay or most hardware stores. I attached it to the smartphone holder with some paper clips.
In general, you can simply drill a hole in the dashboard and secure the holder with a screw.
Well, you have made a universal smartphone holder that fits almost all market smartphone models. It can be used for smartphones without a case, with a case, or with a flip case. It is easy to use with one hand, and when the holder is not needed, it barely rises above the dashboard.
If the evolution of smartphone displays goes the way of larger ones, you can make the holder “jaws”, so that such a holder can also be used with tablets. Enjoy.
-
 April 17, 2015Motorola Moto X Force - detailed review of specifications
 -
 April 17, 2015What to do if your iPhone is stolen
 -
 April 17, 2015From numbers to notes: the best portable DAC Big in small


